Wednesday, April 29, 2009

Yogurt

Homemade Yogurt....

I finally did it! I made homemade yogurt! I have been wanting to do this for a very long time and this week I did it. I have a daughter who just turned one and is not a fan of whole milk. I can't complain because she drinks more water than all of my children combined at the age of 12 months but she's also the skinniest and most petite little baby I've ever had so she needs the dairy fat. In order to help with breakfast prep for a 12 month old, increase dairy consumption, and save grocery dollars (yogurt in southern california averages $1/cup for the on sale price) I made yogurt myself. My husband grew up on homemade yogurt so he was all too pleased to eat made-from-scratch whole milk yogurt compared to the cheap non-fat yogurts I usually buy. The other added bonus is you can customize the fruit flavors per serving! Most days I just put a little homemade fruit jam in the yogurt serving. 

Photobucket There are 16 in a gallon so you can approximate your servings per that number. After 'incubating' I ladled the servings into individual tupperware so they were easier to store and later serve/eat.

*This yogurt is slightly sweet but more like a semi-sweet 'plain' yogurt. Needless to say you definitely need to add some sort of sweetener, whether it be maple syrup, jam, fruit, granola and brown sugar, etc. 
*Be sure to buy a high quality yogurt starter. Look at the label to make sure it has live cultures. The one I bought had I think 5 different types of live cultures, it was organic and it was plain flavored.


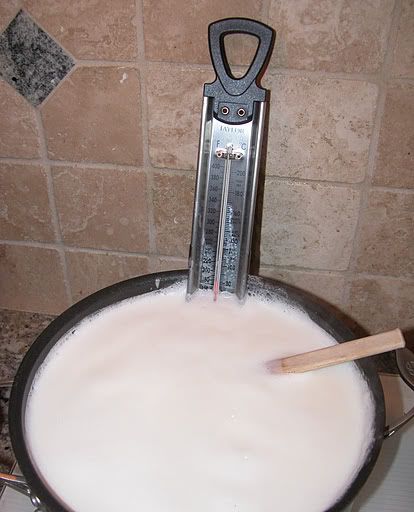
Heat 1 gallon whole milk to 180 degrees.  Remove from heat and let milk cool to 108-122 degrees.  Stir in a carton of plain yogurt.  Pour in a gallon thermos jug.  Put in warm place for 24 hours.  (I put the jug on top of the water heater.)  Chill and enjoy!

Double Chocolate Cheesecake Layered Cake


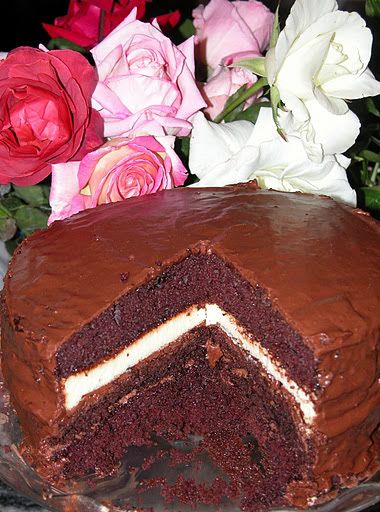
My husband and I celebrated our 8th anniversary yesterday and this is the dessert I made him. Let's just say that he absolutely loved it! I was pleasantly pleased as well because the taste was fabulous but the best part was the preparation was relatively easy. Boxed cake/brownie mixes sure do make things easier! I did make sure to use good quality mixes because if I was going through the effort of making a 5 layered cake it had better taste good!


By the way, this is my photo and I'm not sure if the cake or the roses are prettier (especially that white one at the top right or the darker pink at the left! I'm not sure what type of rose that dark pink is but I love the petals.). I did forget to clean my cake pedestal after cutting a piece. There are so many nit-picks of food photography I am still learning.

Double Chocolate Cheesecake Layered Cake
(courtesy of Jenny on Picky Palate)

2 8 oz packages softened cream cheese
1/2 Cup sugar
2 eggs
1 brownie mix 9x13 inch size
1 chocolate cake mix
Favorite Chocolate Frosting Recipe, prepared (tripled)

1. Preheat oven to 350 degrees F. Place cream cheese and sugar into a stand or electric mixer bowl. Beat until softened. Beat in the eggs until smooth. Pour into a wax paper lined and greased 9 inch springform pan. Bake for 35-40 minutes or until middle is set and not jiggly. Remove and let cool completely. Refrigerate overnight or for 2-3 hours. Carefully remove sides and transfer to wax paper (I used a giant spatula to help, it's ok if it breaks a little, just piece it together and freeze cheesecake for 30 minutes to firm).

2. Prepare brownie mix according to package directions and divide evenly into a wax paper lined and greased 9 inch cake pan. Bake for 25 minutes or until toothpick comes out clean from center. Let cool completely then carefully turn over onto wax paper; set aside.

3. Prepare cake mix according to package directions and pour into 2 wax paper lined 9 inch cake pans. Bake for 25 minutes or until toothpick comes out clean from center. Let cool completely then carefully turn over onto wax paper; set aside.

4. Place one of the chocolate cake layers onto a cake stand. Spread with a thin layer of chocolate frosting then layer with the brownie. Spread brownie with a thin layer of frosting then top with cheesecake layer. Spread with a thin layer of frosting then layer with remaining chocolate cake layer. Spread entire cake with remaining chocolate frosting. Chill until ready to serve.

Monday, April 27, 2009

Bacon-Wrapped Chicken Kabobs


Photobucket

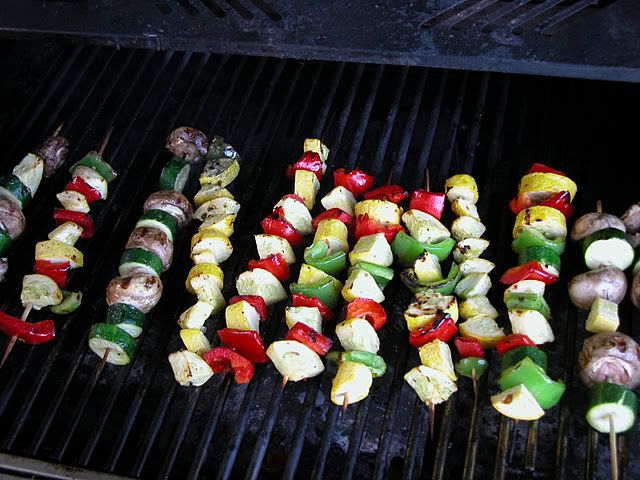
This was dinner tonight and I loved the colors! I always tell my kids that the more rainbow colors the more vitamins! (Fruit Loops don't count!) I'm still a novice at grilling. Tonight's lesson in grilling was that if you must change a diaper while grilling at least turn the grill down. Some of the bacon wraps were casualties tonight.

This recipe comes from Natalie at Perry's Plate. ("Hi Natalie!")  She is the nicest blogging stranger that I've met so far and I love her recipes. If you want to jump over to her blog you'll see this recipe in top-notch photos.


Bacon-Wrapped Chicken Kabobs

adapted from Taste of Home as featured on Perry's Plate

¾ c. Italian dressing
¼ c. lime juice
2 tsp. Worcestershire
1 lb chicken breasts, cut into roughly 1-inch chunks
About 12 slices of thin-cut bacon, cut in half (turkey bacon or prosciutto works nicely, too)
About 24 slices of fresh basil
Metal or wooden skewers

In a zip top bag, combine dressing, lime juice and Worcestershire. Add chicken. Refrigerate for at least an hour or overnight.

Drain and discard marinade. Top bacon slice with piece of chicken and a basil leaf (or sprinkle with dried basil). Roll up and thread onto metal or wooden skewer. Grill, covered, over med heat for 5 min on each side or until chicken juices run clear.


Jayne's Notes: 
- My family loves kabobs especially served over rice. Tonight I squeezed a little lime juice over my serving while eating and it brought out some of the marinade flavor. 
- Cut your chicken on the large size of 1 inch rather than the small. I found that the smaller chicken pieces were done sooner than the bacon wrap. It was also hard to skewer the smaller chicken pieces with the kabob stick. The bacon took a long while to cook so next time I might use prosciutto and see if that cooks quicker.
- I strung pineapple pieces between each chicken wrap. It gave a sweet flavor to the meat and grilled pineapple tastes divine!
- Group your meats on their own sticks since they take the longest to cook. Once the meat is almost done you can add your 'longer cooking time' veggies and lastly your cherry tomatoes since they cook the fastest. (Watch those tomatoes! They really do cook fast and all you want to do is warm the tomato until the skin is just starting to break.)
- I've always been scared of using fresh herbs and when I saw this recipe my first reaction was 'a WHOLE basil leaf on each chicken?!?' There's nothing to fear with this recipe. Fresh basil makes a big difference and the flavor is not overpowering.

Sunday, April 26, 2009

Pumpkin Roll


Photobucket


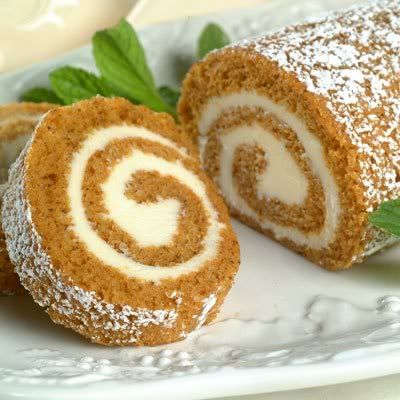
I made my first pumpkin roll tonight. Earlier in the week I came across Tammy's Recipe site while planning my menus so I don't know if this recipe is any better than the next but I must say that I highly recommend this roll since my very first attempt turned out perfect!

Pumpkin Roll

Cake ingredients:

3 eggs
2/3 cup pumpkin
1 cup sugar
1 teaspoon baking powder
1 teaspoon cinnamon
1/2 teaspoon ginger
1/4 teaspoon nutmeg
1/4 teaspoon cloves
3/4 cup flour

Filling:

2 tablespoons butter
8 ounces cream cheese
3/4 teaspoon vanilla
1 cup powdered sugar
1/3 cup nuts, optional
Instructions:

1. Mix all cake ingredients. Lay wax paper on a 15 x 10-inch jelly roll pan. Grease and flour wax paper; pour batter onto wax paper in pan and bake at 375 degrees for 15-20 minutes.

2. Lay a clean dish towel on a flat surface with 1/3 cup powdered sugar sprinkled on it. Put baked cake upside down on towel. Take waxed paper off. Roll cake up with the towel, starting at the widest edge. Allow to cool.

3. Mix filling ingredients. Unroll cake and spread the filling and nuts inside. Roll back up (without the towel, of course!) and refrigerate. Slice into slices to serve.

(Photo courtesy of Nestle)

Pork Strips with Peanut Sauce


Photobucket
We ate this for dinner tonight and loved it! The chili sauce was very mild and I found myself adding more and more. It has a pepper flavor but is not spicy at all. Yummy!

Pork Strips with Peanut Sauce

from Cooking Light & referenced on Meet Me In the Kitchen

1/2 cup boiling water
1/4 cup reduced-fat peanut butter
2 tablespoons rice vinegar
2 tablespoons low-sodium soy sauce
1 teaspoon bottled minced garlic
1 teaspoon bottled ground fresh ginger
2 teaspoons fresh lime juice
1 teaspoon sesame oil
1 teaspoon chile paste with garlic
1 teaspoon honey
1/2 teaspoon cornstarch
Cooking spray
4 (4-ounce) boneless loin pork chops, trimmed and cut into 1/2-inch strips
1 red bell pepper, seeded and thinly sliced (about 2 cups)
1/2 cup thinly sliced green onions
Lime wedges (optional)

Combine first 11 ingredients in a bowl, stirring with a whisk; set aside.  Heat a large nonstick skillet over medium-high heat. Coat pan with cooking spray. Add pork and pepper; cook 6 minutes or until pork is done. Add peanut butter mixture to pan, stirring well to coat pork; bring to a boil. Reduce heat, and simmer 1 minute. Serve over rice or rice noodles and sprinkle with sliced green onions. Serve with lime wedges, if desired.

Thursday, April 23, 2009

Herb Focaccia

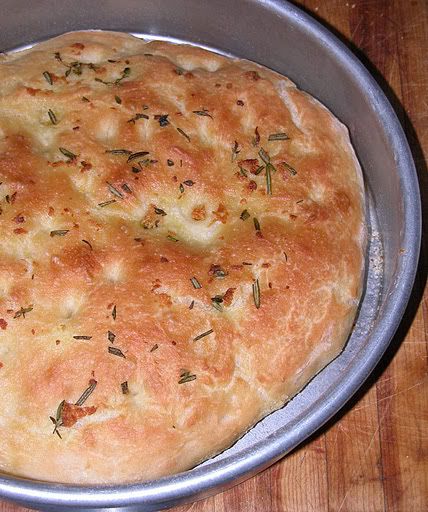
Tonight I made this yummy focaccia bread recipe to eat with our soup. The recipe isn't the quickest to make with the multiple resting and raising times but it turned out wonderful. I especially enjoyed the delicious flavor of the olive oil and fresh herbs from my garden on top. I think a focaccia sandwich is on my lunch menu for tomorrow with my leftover loaf!
Photobucket

Herb Focaccia
Family Fun Magazine October 2007

2 c lukewarm water
1 t sugar
1 packet active dry yeast (2 1/4 t)
1 1/2 t salt
4 1/2 to 5 c unbleached flour
5 T (for dough) plus 1/3 c (for herb drizzle) olive oil
cornmeal for dusting
2 cloves garlic, minced
1 1/2 T chopped fresh rosemary
2 t fresh thyme leaves
coarse salt (optional)

Pour the water into a large mixing bowl and stir in the sugar. Sprinkle the yeast over the water and set aside for 5 minutes to dissolve. Note: If the yeast doesn't begin to bubble within 5 minutes, repeat the process with fresh ingredients.

Add the salt, 3 cups of the flour and 2 T olive oil to the yeast mixture and beat the ingredients with a wooden spoon for 10 minutes. (I used my Bosch mixer with the dough paddle.) Add the remaining flour about 1/2 c at a time, beating well after each addition. When the dough is too hard to be stirred, turn it onto a well floured surface. Using floured hands, knead the dough for 8-10 minutes, using more flour as necessary to keep the dough from sticking.  (Again, still using my Bosch with bread paddles I added flour until the dough pulled clean away from the sides of the bowl and then kept the mixer running for 10 minutes to replace the hand kneading.) 

Pour 1 Tablespoon of olive oil into the bottom of a large bowl. Roll dough around in the oil to coat it before covering the bowl with plastic wrap. Set dough aside in a warm spot to raise until it doubles in size, about 1 hour. When the dough has doubled punch it down and turn it out onto a floured surface. Knead it for 1 minute, then cut the dough in half and knead each half into a rectangle. Set aside on a floured surface to rest for 10 minutes.

While the dough is resting lightly oil a large baking sheet then sprinkle on a light coating of cornmeal. Transfer the dough to the baking sheet. Press and stretch it into oblong shapes, about 1/2 to 1/4 inch thick, leaving 2 inches between the loaves. Brush the tops of the loaves with 2 T olive oil. Set dough aside to rise for 15 minutes and preheat oven to 400 degrees.

In a measuring cup combine the 1/3 c of olive oil with the garlic, rosemary and thyme and stir. Dimple the loaves with your fingertips then spoon the oil-and-herb mixture over each dough rectangle. Sprinkle the loaves with coarse salt if desired.

Bake the focaccia on the center oven rack until the tops are golden brown, about 20-25 minutes. Transfer the loaves to a wire rack. 

*For a slightly thicker bread bake in a round cake pan instead of on a cookie sheet. 

Monday, April 20, 2009

Mozzarella Stuffed Meatball Hoagies

Photobucket
My husband likes a hearty dinner and my kids like spagetti so this was a great crowd pleaser for our family tonight. I have a french bread recipe so instead of buying hoagies I cut the recipe in half and then divided the dough 12 ways into these somewhat larger-than-life hoagies but we all loved them! Thanks Jenny at Picky Palate for the meatball recipe!
Mozzarella Stuffed Meatball Hoagies

1 lb ground beef
1 egg
2 Tablespoons milk
1 Tablespoon Tabasco Hot Sauce
½ Cup Italian Seasoned Bread Crumbs
½ Cup grated parmesan cheese
1 teaspoon salt
½ teaspoon pepper
¼ teaspoon dried oregano (or 1 T fresh)
¼ teaspoon dried basil (or 1 T fresh)
12-15 1 inch mozzarella balls (or cut fresh mozzarella in 1 inch cubes)
1 26oz jar favorite pasta sauce, or homemade sauce
4-6 Hoagie Rolls, cut in half
4 sliced provolone cheese, each cut into halves (I think this is optional)
1. Preheat oven to 350. Place beef, egg, milk, hot sauce, bread crumbs, parmesan, salt, pepper, oregano and basil in a large bowl. With hands or large spoon, mix until well combined.
2. Scoop about ¼ Cup meat mixture in hands; press 1 mozzarella ball into middle of meat and form a ball around the cheese. Do this until all meat and cheese is used up; makes about 12-15 large meatballs.
3. Place all meatballs into a 9x13 inch baking dish that has ¼ Cup olive oil spread into bottom. Bake for 20 minutes; flip all meatballs. Bake for an additional 15-20 minutes or until meatballs are cooked through.
4. Place pasta sauce into a large pot. Place cooked meatballs in sauce.Simmer on low heat.
5. Place ½ slice of provolone onto the cut sides of rolls. Place onto tin foil or baking sheet and broil in oven for 1-2 minutes or until rolls are toasted and cheese is melted.
6. Place 3-4 meatballs onto bottom halves of toasted rolls. Spoon pasta sauce over meatballs and sprinkle with parmesan cheese. Close with top roll and serve warm.

**Jayne's Notes: When broiling my Hoagies I buttered each, put mozzarella on one half and a quick shake of Parmesan and garlic salt on the other. Also, the fresh herbs made a HUGE difference in the meat mixture! (I actually think the meat would have been a bit drab if not for the intense flavor of fresh herbs.)
Also, I cut my meatballs in half when serving so they fit better on the sandwich. (I don't like to get a huge chunk of meatball when I bite into the sandwich so that was an added bonus of halving your meatballs.)

Food...just for laughs

Photobucket
I made this felt play food for my kids the other day and they're loving it! Pizza toppings yet to come...

Tuesday, April 14, 2009

PW's Blue Cheese and Bacon Burger

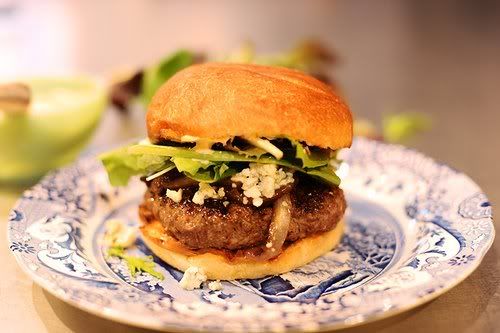
Photobucket

We are having so much fun cooking on the grill at least once a week. Let's just the grill we use now, a stainless steel LARGE gas grill, is a major step up from briquets in a knee-high grill. I found this recipe on Pioneer Woman's site and was slightly hesitant when I saw all that blue cheese. Don't get me wrong because I do like blue cheese, just not gobs of it with nothing else to temper the flavor. This hamburger has just the right mix of flavors and I especially enjoyed the carmelized purple onions.

PW's Blue Cheese and Bacon Burger

2 lbs 80/20 ground beef
1 red onion, sliced (not too thick, not too thin)
crumbled blue cheese
mayo
Tabasco sauce
2 T brown sugar
kaiser rolls
lettuce

Place the ground beef in a medium mixing bowl. Add 1 t salt, 1/2 t pepper and a few dashes of Tabasco. With your hands, mix seasonings into meat. Set aside.

For the onions, heat a medium skillet over low heat. Add 2 T butter. Dup in the sliced red onions and 2 generous tablespoons of brown sugar. Give it a toss to combine the ingredients, then allow the onions to caramelize over low heat for about twenty minutes, tossing occasionally.

While the onions are caramelizing, make the spicy mayo by placing the 1/4 c may in a bowl and adding a few dashes of Tabasco. Stir together and test for taste.

Next, slice the Kaiser rolls in half and spread each half with butter. Place them face down on a grill pan or skillet over medium heat. Lightly grill the rolls until crispy.

Form the meat into patties and place on a grill on medium-low heat. Allow meat to cook about 3 minutes, then using a spatula rotate it 45 degrees leaving it on the same side. After a few minutes flip the burger and cook on the other side, rotating it 45 degrees again to get the nice grill makrs. Now add a large helping of the caramelized onions over the top, followed by a generous helping of crumbled blue cheese. As the meat finishes cooking, spread the spicy may on the rolls and transfer the burger onto the bun. Top with a handful of greens and the other bun.

Sunday, April 12, 2009

Lemon Cheesecake

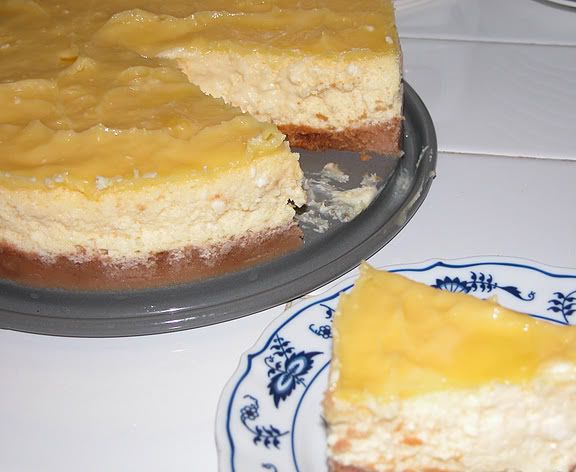
Photobucket


This is one of my favorite cheesecake recipes ever! It's especially fun to eat in the spring/summer when lemons are fresh and you're in the mood for some zingy sweets. We ate this cheesecake for Easter and my 6 year old daughter and her cousin ate seconds so this is a bonafide kid friendly recipe. The only downside to this recipe is that the preparation time is lengthy but the taste is way worth the effort.

Lemon Cheesecake
Cook's Illustrated published May 1, 2003

Ingredients
Cookie-crumb crust:
5 oz Nabisco Animal Crackers or Social Tea Biscuits
3 T sugar
4 T unsalted butter, melted and kept warm

Filling:
1 1/4 c sugar
1 T grated lemon zest
1/4 c lemon juice
1 1/2 lbs cream cheese (three 8-oz packages), cut into 1-inch chunks and left to stand at room temperature 30-45 minutes
4 large eggs
2 t vanilla extract
1/4 t table salt
1/2 c heavy cream

Lemon Topping:
1/3 c lemon juice
2 large eggs
1 large egg yolk
1/2 c sugar
2 T unsalted butter, cut into 1/2 inch cubes and chilled
1 T heavy cream
1/4 t heavy cream
pinch of table salt

1. For the crust: Adjust oven rack to lower-middle position and heat oven to 325 degrees. In food processor, process cookies to fine, even crumbs, about 30 seconds (you should have about 1 cup). Add sugar and pulse 2 or 3 times to incorporate. Add warm melted butter in slow, steady stream while pulsing; pulse until mixture is evenly moistened and resembles wet sand, about ten 1-second pulses. Transfer mixture to 9-inch springform pan; using the smooth bottom of a glass or liquid measuring cup, press firmly and evenly into pan bottom, keeping sides as clean as possible. Bake until fragrant and golden brown, 15-18 minutes. Cool on wire rack to room temperature, about 30 minutes. When cool wrap outside of pan with two 18-inch square pieces of heavy-duty foil; set springform pan into a roasting pan.

2. For the filling: While crust is cooling process 1/4 c sugar and lemon zest in food processor until sugar is yellow and zest is broken down, about 15 seconds, scraping bowl if necessary. Transfer lemon sugar to small bowl; stir in remaining 1 c sugar. In standing mixer fitted with paddle attachment beat cream cheese on low to break up and soften slightly, about 5 seconds. With machine running add sugar in slow steady stream; increase speed to medium and continue to beat until mixture is creamy and smooth, about 3 minutes, scraping down bowl with rubber spatula as needed. Reduce speed to medium0low and add eggs 2 at a time; beat until incorporated, about 30 seconds, scraping sides and bottom of bowl well after each addition. Add lemon juice, vanilla and salt and mix until just incorporated, about 5 seconds. Add heavy cream and mix until just incorporated, about 5 more seconds. Give batter a final scrape, stir with rubber spatula, and pour into prepared springform pan; fill roasting pan with enough hot tap water to come halfway up side of springform pan. Bake until center jiggles slightly, sides just start to puff, surface is no longer shiny, and instant-read thermometer inserted in center of cake registers 150 degrees, 55-60 minutes total. Turn off oven and prop open oven door with potholder or wooden spoon handle; allow cake to cool in water bath in oven for 1 hour. Transfer springform pan without foil to wire rack; run small paring knife around inside edge of pan to loosen sides of cake and cool cake to room temperature, about 2 hours.

3. For the lemon curd: While cheesecake bakes, heat lemon juice in small nonreactive saucepan over medium heat until hot but not boiling. Whisk eggs and yolk in medium nonreactive bowl; gradually whisk in sugar. Whisking constantly, slowly pour hot lemon juice into eggs, then return mixture to saucepan and cook over medium heat, stirring constantly with wooden spoon until mixture registers 170 degrees on instant-read thermometer and is thick enough to cling to spoon, about 3 minutes (*see notes below). Immediately remove pan from heat and stir in cold butter until incorporated; stir in cream, vanilla and salt, then pour curd through find-mesh strainer into small nonreactive bowl. Cover surface of curd directly with plastic wrap; refrigerate until needed.

4. To finish cake: When cheesecake is cool scrape lemon curd onto cheesecake still in springform pan. Using an offset icing spatula spread curd evenly over top of cheesecake. Cover tightly with plastic wrap and refrigerate for at least 4 hours or up to 24 hours. To serve, remove sides of springform pan and cut cake into wedges.

*Jayne's notes: Be sure to set your cream cheese out ahead of time to soften. Also use large enough foil, wrap it very tightly around your springform and make sure the pan is latched snugly to avoid water leaking into your cake. This cake can be refrigerated up to 4 days but the crust does become soggy. Regarding judging if the curd is ready: it will first appear thin and soupy but while stirring constantly it will begin to leave a clear trail in the bottom of the saucepan. When the curd leaves the clear trail that quickly disappears it is ready to come off the heat. If the curd continues to cook it will become thick and pasty and a spatula will leave a wide clear trail.
Thursday, April 2, 2009

Cilantro-Lime Chicken with Avocado Salsa

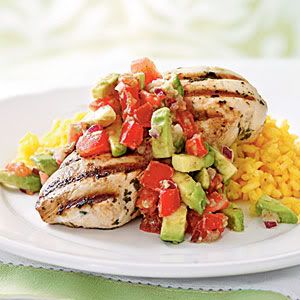
Photobucket

Photo courtesy of Cooling Light.com
We now live in California and it is so much fun stepping into the back yard to get produce. Our citrus tree collection includes 2 lemon, 2 grapefruit, 1 lime, 2 orange and 1 mandarin orange. Needless to say, fresh squeezed lemonade is now my daughters' favorite drink.  

We had this recipe for dinner the other night. It's definitely a low-fat recipe but the avocado salsa adds a lot of flavor. I even found myself eating the salsa as a topping to my white rice. The original recipe recommends serving with safron rice (pictures above) but I couldn't find my safron so instead I added chicken boullion, a squeeze of lime and fresh cilantro to the rice. This recipe is great with lime or you can substitute lemon if that's what is handy. Also, I used purple onion in the salsa since it adds color and a touch more flavor.  

Besides the big flavor of the finished dish the other big bonus to this dish is that you only marinade the chicken for 3 minutes! I love quick preparation meals!

Cilantro-Lime Chicken with Avocado Salsa 
(Recipe courtesy of Cooking Light magazine)

Chicken: 
2 T minced fresh cilantro
2 1/2 T fresh lime juice
1 1/2 T olive oil
4 skinless, boneless chicken breasts
1/4 t salt
cooking spray

Salsa:
1 c chopped tomato
2 T finely chopped onion
2 t fresh lime juice
1/4 t salt
1/8 t ground pepper
1 avocado, peeled and diced

To prepare chicken, combine first 4 ingredients in a large bowl; toss and let stand 3 minutes. Remove chicken from marinade; discard marinade. Sprinkle chicken evenly with 1/4 t salt. Heat a grill pan over medium-high heat. (I used our BBQ.) Coat pan with cooking spray. Add chicken to pan; cook 6 minutes on each side or until done.

To prepare salsa, combine tomato and next 4 ingredients (through pepper) in a medium bowl. Add avocado; stir gently to combine. Serve salsa over chicken.

*Jayne's Notes: I thought it definitely needed more salt so that was added later once the food was served.
Related Posts Plugin for WordPress, Blogger...