Sunday, December 13, 2009

Chili Seasoning Mix

I love a warm meal on a cold winter's night. This past week we've had a lot of rain and chilly weather so for Sunday dinner I decided to make some yummy chili. I have tried so many different chili recipes and purchased mixes and this recipe compares with the rest. This was a tasty chili mix that we all enjoyed and plan to use again. I found this recipe on 'Our Best Bites' as a bulk mix recipe to give in gift bags as cute holiday gifts.


Chili Seasoning Mix Recipe from OurBestBites.com
This makes one gift serving, so multiply by however many you'd like to package up. **You only need 4 Tablespoons for a normal-sized chili meal so I quartered this recipe my first time. Now that I know we like the flavors of this mix I'm going to mix a larger batch and save it for future use.

1/2 C chili powder
1/4 C ground cumin
2 T garlic salt
2 T dried oregano leaves
1 T ground coriander
1 t cayenne pepper or chipotle chili powder (add more if you like spicy chili)

If you are making a big batch, make sure to mix it very well so all of the spices get evenly distributed.


Hearty Chili

1 lb ground beef, turkey or sausage (you can leave out the beef to make it a vegetarian chili)
1 onion, diced
1 red or green bell pepper, diced
4 T chili seasoning mix
2 16oz cans pinto beans (I sometimes even use black beans)
2 16 oz cans kidney beans
1 28oz can diced tomatoes, undrained
1 14oz can beef broth

Drain and rinse beans and set aside. Combine meat and onion in large pot over med-high heat and cook until browned. Drain and discard fat. Add remaining ingredients and bring to a boil. Reduce heat and simmer for 30-40 minutes, stirring occasionally.


*I made this by soaking and cooking kidney beans on low over night in the crock pot. This morning I put the remaining ingredients in and let them all cook on low until dinner. I just love a Sunday dinner that cooks itself!
Wednesday, December 2, 2009

The Best Enchiladas Ever!


Living in southern California we are definitely eating our fill of Mexican foods. I am loving it since this is what I have eaten all my life and I just happen to prefer chips and salsa over dessert (most of the time). My husband on the other hand is a self-proclaimed beef and potatoes guy. The other night I called him to say that yes we were eating Mexican food again for dinner but that I had rave reviews about this recipe and it didn't look too spicy. Well, this turned out REALLY good and my husband was happy to finish off the casserole dish. I was even cooking for my Aunt from Kansas that night and she loved this so much that she made it for her family the weekend she got home.

I thought the flavors in the chicken were so delicious that I didn't even serve this with sour cream! I took a taste with a little sour cream and actually tasted better without. This simple yet very tasty recipe is my new turn-to for enchiladas!


Honey Lime Chicken Enchiladas
from yourhomebasedmom.com

6 Tbsp honey
5 Tbsp fresh lime juice (1-2 limes)
1 Tbsp chili powder
1 tsp garlic powder
2-3 skinless, boneless chicken breasts, cooked and shredded
8 – 10 flour tortillas (depending on size)
1 lb of a Mexican blend cheese (monterey jack, colby, cheddar), shredded
1 large can of green enchilada sauce

Mix the honey, lime juice, chili powder and garlic powder together with the shredded chicken. Allow it to sit for at least 1/2 hour or you could do it hours before and just cover and refrigerate.

Pour 1/2 cup of enchilada sauce into bottom of a 9 x 13 pan. Place chicken and cheese into middle of a tortilla and spoon about 1 tablespoon of enchilada sauce over it and roll up. Place seam down in the pan. Reserve about 1-2 cups of cheese to sprinkle on top of enchiladas. Pour enchilada sauce over the top of rolled enchiladas and sprinkle with remaining cheese.

Bake at 350 degrees for about 25 minutes or until lightly browned and bubbly.

*Jayne's Notes: This recipe was PERFECTION! Next time I may try it with Cilantro Lime Rice as recommended.

Saturday, November 28, 2009

Candied Coconut Sweet Potatoes


This year for Thanksgiving we gathered for a large extended family dinner with my dad's side of the family. I remember when I was young we used to get together with these same relatives but once my uncle became sick and passed away and my grandma as well we didn't gather as often. I really enjoyed this mini reunion and seeing family that I haven't seen in many years.

I have never thought of sweet potato casserole as a must-have for Thanksgiving dinner. A few years ago when Dan and I started making our own dinner for just our little family we made sweet potatoes with marshmallows on top which the kids ate. This year I saw this recipe for sweet potatoes with coconut crumble on top and I just had to make it. With my ridiculous fashion of cooking a brand new and never tested recipe when guests come for dinner, I made this recipe and we all loved it! It will definitely be a staple on our traditional Thanksgiving dinner table.


Candied Coconut Sweet Potatoes
Recipe from Our Best Bites


4 C mashed Sweet potatoes (4 med sweet potatoes or abt 2 large sized cans)
6 Tbs Sugar
6 Tbs butter (no margarine), softened or melted
2 eggs, beaten
1/2 can Sweetened Condensed Milk (eyeball it)
1 t vanilla

Topping:
1 C brown sugar
1 C sweetened coconut flakes
6 Tbs melted butter

Note: You can make these up to a day or two ahead of time, just keep them well covered in the fridge and don't put the topping on until just before baking.

If using fresh sweet potatoes, preheat oven to 400 degrees. Prick each sweet potato with a fork and place on foil in the oven. Cook for 40-60 minutes or until tender. Once they've cooled enough to handle, slice in half and scoop out the insides into a mixing bowl.

To the mixing bowl add in sugar, butter, eggs, sweetened condensed milk, and vanilla. Your butter should be soft enough to blend up easily so nuke it in the microwave before you add it to the bowl if you need to. You could mash it all up by hand, but an electric mixer works great. Spread this mixture evenly into a 9 x 13 pan.

For the topping, combine brown sugar and coconut and then pour melted butter over and combine. Sprinkle the potatoes with the topping and bake in a 350 degree oven for about 40-50 minutes.The top should be nice and browned and bubbly so just keep an eye on it.

Jayne's Notes: 
*I highly recommend using fresh sweet potatoes. Their preparation is just like baking a normal potato so it's real easy. Also, the canned potatoes have added sugar so be aware that this recipe already is plenty sweet and you may want to leave out the sugar in the batter if you used canned yams. 
*I increased the crumble topping mixture because we all like a bite of yummy crumblies with our sweet potatoes. I ended up doubling the sweet potato mixture (allowing me to use the entire can of sweetened condensed milk) and making the crumble recipe x 2 1/2. 
*The original recipe said you could leave the sweet potatoes slightly clumpy and not fully beat the mixture smooth. Next time I try this idea and beat the batter ingredients separately to allow them to fully mix and then mix it with the sweet potatoes until just barely mixed yet still lumpy.

Saturday, November 14, 2009

Carrot and Red Pepper Soup

"Have you eaten your vegetables today?"  I was very skeptical of this recipe when I first saw it. I do enjoy carrot soups but I've only ever tasted a recipe that included cream. I was also very hesitant about the orange juice (the original recipe included orange zest but I didn't want to go that far with the citrus flavor.) The reasons I did make this recipe is because: I had a lot of carrots in the fridge to eat,  Autumn is here and I love making soups in cooler weather,  I'm trying to eat more healthy, and most importantly I read on Just that Good's site that their toddlers at this soup right up!

Well, my husband and I were pleasantly surprised at the yummy taste. My kids' verdict: they ate it in a blink so I guess they enjoyed it as well.

Carrot and Red Pepper Soup
Altered by me from 'Blogging, it's what's for dinner'

2 T. butter or olive oil
1 red bell pepper, cut into 1 inch pieces
1 medium onion, diced
1 lb. carrots, thinly sliced
1/2 c white rice
Sea salt and freshly milled pepper
2 T. parsley chopped or 1 T dried
3 T. dill chopped or 1 1/2 T. dried dill
Juice of 1 orange
6 cups water, chicken or basic vegetable stock

Melt the butter in a soup pot and add the bell pepper, onion, carrots, rice and 1 teaspoon sea salt. Cook over medium heat, covered until the onion has softened completely, about 10 minutes, stirring several times.*

Add a grind of pepper, the parsley, dill, orange juice and water/broth.*  Bring to a boil, then simmer, partially covered, until the rice is cooked, about 25 minutes. Cool briefly, then puree all but a cup or two of the soup and return it to the pot. Taste for salt, season with pepper, garnish and serve. This soup may be served hot as well as chilled.

*Jayne's Notes:
When sauteing the onion add more oil or butter if it gets too dry. I ended up adding a little of both for added flavor.) 
I used 4 cups broth and 2 cups water because I liked the slight chicken broth flavor in the soup.) 

Monday, November 9, 2009

Apple Pie Filling

I have been busy with food but not how you would think. We moved to California earlier this year and I have been attempting to learn the art of gardening. In fact, today I planted my fourth round of veggie plants including romaine lettuce, collard greens, cauliflower, cabbage, carrots and celery. I've never grown collards, carrots or celery so we'll see how those turn out. I don't think I've ever eaten collards before but I've been told that they are loaded with even more vitamins than spinach are are great in a shake masked with fruit. My broccoli, peas and green beans that I planted 3 weeks ago are really thriving and I think I'll be harvesting some beans/peas soon. My summer  bell peppers plants are still happily producing and I've taken to eating slices of bell pepper with my favorite homemade hummus for lunch. It's surprisingly filling and of course helps my diet! Two weeks ago I picked 72 bell peppers from my five pepper plants. Seventy-two!!! These are great sliced and then frozen for later use. (See bottom part of picture below.)

I think I could talk about the ups and downs of my gardening efforts forever but here is the even bigger reason for my lack of posts. I have been drying, fruit leathering and saucing apples like it's going out of style! To date I have about 140 quarts of apple sauce, 2 gallon bags of dried apples (more to come of these since hubby likes to take them to work as a snack), 15 pints of apple pie filling and a handful of fruit leather rolls.

In this picture you can see some apple sauce to the left because we ran out of time on sauce day and had to freeze a couple batches. In the center is some of my pie filling and on the lower side of the photo is some of my frozen bell peppers.

I really liked the taste of the pie filling and wanted to share this easy recipe with you. It's loaded with sugar so there isn't much NOT to like. Mmmm!

Apple Pie Filling
Recipe from Ball's Blue Book of Preserving

Yield: about 6 pints

6 lbs apples
2 c sugar
1/4 c flour
1 1/2 t cinnamon
1/4 t nutmeg
2 T lemon juice

Wash, peel, core and [thinly] slice apples. Treat to prevent darkening. (Place in large bowl with 2 quarts of water and 2 T Fruit Fresh or I used additional lemon juice in place of the Fruit Fresh. Don't let set in mixture for more than 10 minutes.)

Combine sugar, flour and spices. Rinse and drain apples; stir into sugar mixture. Let stand until juices begin to flow, about 30 minutes. Stir in lemon juice. Cook over medium heat until mixture begins to thicken. Ladle pie filling into can-or-freeze jars, leaving 1/2-inch headspace. Cool at room temperature, not to exceed 2 hours. Seal, label and freeze.


My mother-in-law gave this Ball book to me a couple years ago. It is a great resource for food preservation.

Tuesday, November 3, 2009

Panko-Crusted Pork Chops with Creamy Herb Dressing

I made this yummy dinner last night for my dad's birthday and we all loved it. I really liked how moist the pork turned out and how the bread crumbs were so large and crumbly even after pan-frying them. I love Panko crumbs! The sauce also added great flavor to the meat.


Panko-Crusted Pork Chops with Creamy Herb Dressing
from Cooking Light October 2008

Makes 2 servings

PORK
2 teaspoons all-purpose flour
1/4 teaspoon salt
1/4 teaspoon onion powder
1/4 teaspoon ground cumin
1/4 teaspoon chili powder
1/8 teaspoon ground red pepper
1 teaspoon low-sodium soy sauce
1 large egg white
1/3 cup panko
2 (4-ounce) boneless center-cut loin pork chops (about 1/2 inch thick)
1 teaspoon canola oil
cooking spray

DRESSING
1 tablespoon chopped green onions
1 tablespoon chopped fresh flat-leaf parsley
2 tablespoons sour cream
1 tablespoon milk
1 tablespoon reduced-fat mayonaise
1 teaspoon cider vinegar
1/4 teaspoon garlic powder

To prepare pork, preheat oven to 450°.  Combine first 6 ingredients in a shallow dish. Combine soy sauce and egg white in a medium bowl, stirring with a whisk. Place panko in a shallow dish.  Dredge pork in flour mixture; dip in egg mixture. Dredge in panko. Heat oil in a large nonstick skillet over medium-high heat. Add pork to pan; cook 1 minute on each side. Place pork on a baking sheet coated with cooking spray. Bake at 450° for 6 minutes or until done.

To prepare dressing, combine onions and the remaining ingredients. Serve dressing with pork.

Monday, September 28, 2009

Chinese Pork and Rice

We found this recipe in a really old Betty Crocker cookbook. My husband lived in Taiwan for two years and he is always trying to replicate the delicious Chinese food he ate there. This recipe where the rice is fried in oil comes as close as he can get to making fried rice like they do in Asia. We really liked the taste of this rice but next time I think I want to add more vegetables, maybe slivered carrots or small broccoli pieces.

Chinese Pork and Rice
Betty Crocker's Good and Easy Cookbook
(I don't know the year as the title page is missing but the book is old and the pictures are definitely retro.)

2/3 c uncooked rice
2 T cooking oil
1 t salt
1 1/2 c boiling water
1 bouillon cube
2 t soy sauce
1 medium onion, chopped
2 stalks celery, chopped
1 green pepper, chopped
1 c diced cooked pork

Cook rice in hot oil until golden brown. Add salt, water, bouillon cube, soy sauce. Cover; cook 20 minutes. Add rest of ingredients and 1/4 cup more water, if necessary. Cover tightly, cook 10 minutes more.

(4 servings)

Monday, September 21, 2009

Chocolate-Filled Ebilskivers

My husband's family introduced me to this lovely little Danish pancake called an 'Ebilskiver'. They have been making these pancakes for years thanks to their sweet Grandma Kjar and her Danish roots. I've even heard that the family record is eating 32 in one sitting, although I wouldn't recommend attempting to beat that record.

We received this pan as a wedding gift from a friend and have always enjoyed making the original recipe and serving it with syrup or a little butter and sugar. The other night as a surprise for my chocolate-loving husband I decided to try a variation of the traditional recipe. After pouring the batter I put two Wilton brand chocolate wafers in the pancake and then cooked/turned the pancake as usual. The result was a yummy, chocolatey treat!

I've also found a couple other recipe variations on Natalie's site and Williams Sonoma that I'm looking forward to making.


Here is Williams Sonoma's pancake batter ingredients and instructions per the cinnamon-bun filled pancake recipe. Our recipe is very similar.


2 cups all-purpose flour
1 tsp. baking powder
1/2 tsp. salt
1 Tbs. granulated sugar
4 eggs, separated
2 cups milk
4 Tbs. (1/2 stick) unsalted butter, melted, plus more for cooking

To make the pancakes, in a bowl, whisk together the flour, baking powder, salt and granulated sugar. In another bowl, lightly whisk the egg yolks, then whisk in the milk and the 4 Tbs. melted butter. Whisk the egg yolk mixture into the flour mixture until well combined; the batter will be lumpy. Using an electric mixer fitted with the whisk attachment, beat the egg whites on high speed until stiff but not dry peaks form, 2 to 3 minutes. Using a rubber spatula, gently fold the whites into the batter in two additions. Put 1/8 tsp. melted butter in each well of a filled-pancake pan. Set over medium heat and heat until the butter begins to bubble. Pour 2 Tbs. batter into each well. Cook until the bottoms are golden brown and crispy, about 3 minutes. Using 2 skewers, flip the pancakes over and cook until golden and crispy, about 3 minutes more. Transfer the pancakes to a plate. Repeat with the remaining batter.

*Jayne's Notes: I used olive oil instead of butter to oil my pan. I also found that I had to regrease the pan between batches to avoid sticking. These treats with the added chocolate can even be served as a finger-food dessert.

Monday, August 31, 2009

Roasted Tomatoes

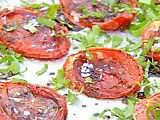
My husband found Ina Garten's Roasted Tomatoes recipe on the Food Network site and since we had so many garden tomatoes we made this as a side dish for dinner. It was an easy and delicious twist to sliced tomatoes and we all loved them.

Photobucket
Roasted Tomatoes
Recipe and Photo Courtesy of the Food Network

    • 12 plum tomatoes, halved lengthwise, cores and seeds removed
    • 4 tablespoons good olive oil
    • 1 1/2 tablespoons balsamic vinegar
    • 2 large garlic cloves, minced
    • 2 teaspoons sugar
    • 1 1/2 teaspoons kosher salt
    • 1/2 teaspoon freshly ground black pepper

    Directions

    Preheat the oven to 450 degrees F.
    Arrange the tomatoes on a sheet pan, cut sides up, in a single layer. Drizzle with olive oil and balsamic vinegar. Sprinkle the garlic, sugar, salt, and pepper over the tomatoes. Roast for 25 to 30 minutes, until the tomatoes are concentrated and beginning to caramelize. Serve warm or at room temperature.

    *Jayne's Notes: It looks like she garnished with maybe some fresh parsley. We didn't garnish our dish and it tasted just fine. I did serve these directly off the pan because they were too delicate to transfer to a serving dish.

Saturday, August 8, 2009

Pasta with Zucchini and Toasted Almonds

Okay, so you may have your doubts about this recipe being bland but it is surprisingly flavorful! I even put Italian dressing on our dinner table with the plan of adding it to the kids' servings to spice it up but we all ate it plain. I don't know if it was the fresh grated pecorino Romano cheese on top or the mint and thyme from our garden or just the mix of all the fresh ingredients that gave this such a delicious flavor. I was also happy to find a good recipe that used cherry tomatoes. My six cherry tomato plants are all volunteers and they are regrettably my healthiest tomato plants in the entire garden. Unfortunately they are at this moment spoiling on the vine because I'm having a hard time eating them quick enough. If any of you have some yummy cherry tomato recipes (other than kabobs and green salads) let me know!


Pasta with Zucchini and Toasted Almonds
Recipe Courtesy of Cooking Light
  • 2 cups cherry tomatoes, halved
  • 2 tablespoons minced shallots
  • 1 teaspoon minced fresh thyme
  • 2 teaspoons fresh lemon juice
  • 3/4 teaspoon kosher salt
  • 1/2 teaspoon freshly ground black pepper
  • 1/4 teaspoon sugar
  • 5 teaspoons extra-virgin olive oil, divided
  • 1 (9-ounce) package refrigerated linguine
  • 1 1/2 teaspoons bottled minced garlic
  • 3 cups chopped zucchini (about 1 pound)
  • 3/4 cup fat-free, less-sodium chicken broth
  • 3 tablespoons chopped fresh mint, divided
  • 1/3 cup (1 1/2 ounces) grated fresh pecorino Romano cheese
  • 3 tablespoons sliced almonds, toasted
1. Combine first 7 ingredients in a medium bowl. Add 2 teaspoons oil, tossing to coat.
2. Cook pasta according to package directions, omitting salt and fat. Drain well.
3. Heat a large nonstick skillet over medium-high heat. Add the remaining 1 tablespoon oil to pan, swirling to coat. Add garlic to pan; sauté 30 seconds. Add zucchini; sauté 3 minutes or until crisp-tender. Add broth; bring to a simmer. Stir in pasta and 1 1/2 tablespoons mint; toss well. Remove from heat; stir in tomato mixture. Place 1 1/2 cups pasta mixture in each of 4 bowls; top evenly with remaining 1 1/2 tablespoons mint. Sprinkle each serving with 4 teaspoons cheese and 2 teaspoons almonds.

Nutritional Information

Calories: 344
Fat: 12.7g (sat 3.1g,mono 6.6g,poly 2g)
Protein: 14g
Carbohydrate: 45.5g
Fiber: 5.3g
Cholesterol: 58mg
Iron: 3.4mg
Sodium: 601mg
Calcium: 163mg

Feta-Stuffed Turkey Burgers

If you haven't noticed already, I'm rather drawn to ground turkey and these meat patties have a flavor that just makes my mouth water. We made this burger recipe the other night and with the feta filling and the yogurt/cucumber sauce it almost felt like I was eating a Greek burger if such a thing exists. I'm really trying to be more careful about what I eat and this dinner was very satisfying yet low-calorie! I loaded mine with plenty of lettuce and fresh garden tomatoes and ate it on a yummy flat-bread bun I found at Costco that was low calorie as well.


Feta-Stuffed Turkey Burgers
Recipe Courtesy of Cooking Light
  • 1/4 cup finely chopped red onion
  • 1 teaspoon dried oregano
  • 1 teaspoon grated lemon rind
  • 1/2 teaspoon salt
  • 1/4 teaspoon freshly ground black pepper
  • 1 pound ground turkey
  • 6 tablespoons (1 1/2 ounces) crumbled feta cheese
  • Cooking spray
  • 1/4 cup grated English cucumber
  • 1/4 cup plain fat-free yogurt
  • 1 tablespoon chopped fresh mint
  • 4 (1/4-inch-thick) slices tomato
  • 4 green leaf lettuce leaves
  • 4 (2-ounce) Kaiser rolls or hamburger buns
1. Combine first 6 ingredients. Divide mixture into four portions. Indent center of each portion; place 1 1/2 tablespoons feta into each. Fold turkey mixture around cheese; shape each portion into a 1/2-inch-thick patty.
2. Heat grill pan over medium-high heat. Coat pan with cooking spray. Add patties; cook 5 minutes on each side.
3. Combine cucumber, yogurt, and mint in a small bowl. Arrange 1 turkey patty, 1 tomato slice, 1 lettuce leaf, and 2 tablespoons yogurt mixture on bottom half of each roll. Top with top halves of rolls.
Sautéed zucchini: Heat 2 teaspoons olive oil in a large skillet over medium-high heat. Add 2 cups sliced zucchini and 2 minced garlic cloves; sauté 5 minutes. Add 2 teaspoons lemon juice, 1/4 teaspoon salt, and 1/8 teaspoon black pepper.

Nutritional Information

Calories: 386
Fat: 13.7g (sat 4.5g,mono 4.3g,poly 3g)
Protein: 30.2g
Carbohydrate: 34g
Fiber: 2.3g
Cholesterol: 109mg
Iron: 3.9mg
Sodium: 897mg
Calcium: 198mg

Thursday, August 6, 2009

Smothered Chicken with Lemon Mashed Potatoes

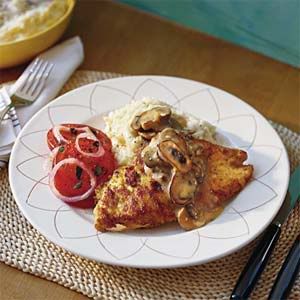
Southern Living recipes are so yummy! I had some leftover mashed potatoes the other night so I whipped this little piece of 'tater and gravy goodness together. I really enjoyed the lemony twist to the potatoes. I even served this dish with sliced tomatoes from my garden!

Photobucket
Smothered Chicken with Lemon Mashed Potatoes
Recipe and Photo Courtesy of Southern Living

4 skinned and boned chicken breasts
3/4 teaspoon salt, divided
1/2 teaspoon pepper, divided
1/2 cup Italian-seasoned breadcrumbs
1 (8-ounce) package sliced fresh mushrooms
1 teaspoon olive oil
18 to 20 garlic cloves, crushed
2 tablespoons olive oil, divided
Lemon Mashed Potatoes
2 tablespoons butter or margarine, divided
1 (14-ounce) can chicken broth
1 tablespoon fresh lemon juice
1/2 teaspoon dried basil
1/4 teaspoon dried oregano
3 tablespoons all-purpose flour
1/4 cup water

Place chicken between 2 sheets of heavy-duty plastic wrap; flatten to 1/4-inch thickness, using
a meat mallet or rolling pin. Sprinkle both sides of chicken evenly with 1/2 teaspoon salt and
1/4 teaspoon pepper. Dredge in breadcrumbs. Set aside.

Sauté mushrooms in 1 teaspoon hot oil in a large nonstick skillet over medium-high heat 8
minutes or until edges are browned. Remove from skillet. Sprinkle with remaining 1/4
teaspoon salt and 1/4 teaspoon pepper; set aside.

Sauté garlic in 1 tablespoon hot oil over medium heat 5 to 10 minutes or until lightly browned
and soft. Remove from skillet, and mash lightly with a fork or potato masher; set aside.

Prepare Lemon Mashed Potatoes, and keep warm.

Melt 1 tablespoon butter with 1/2 tablespoon oil in skillet over medium heat; add 2 chicken
breasts, and cook 4 minutes on each side or until done. Remove chicken to a wire rack in a
jellyroll pan. Keep chicken warm in oven at 225°. Repeat with remaining butter, oil, and
chicken.

Stir chicken broth and next 3 ingredients into skillet, and cook 2 minutes, stirring to loosen
particles from bottom of skillet. Stir in sautéed mushrooms and garlic. Stir together 3 tablespoons flour and 1/4 cup water; whisk into broth mixture over medium-
high heat. Cook 3 minutes, whisking constantly, or until thickened. Serve with chicken and Lemon Mashed Potatoes.

Lemon Mashed Potatoes
Prepare 1 (22-ounce) bag frozen mashed potatoes according to package directions. Stir in 1/4 cup butter or margarine, 1 teaspoon lemon rind, 3/4 teaspoon salt, and 1/4 to 1/2 teaspoon freshly ground black pepper.
*Jayne's Notes: I prepared my mashed potatoes from scratch as I usually do with boiled potatoes, sour cream, butter, salt and pepper but added a couple squeezes (Tablespoons) of fresh lemon juice instead of the rind.

Zucchini Lasagna

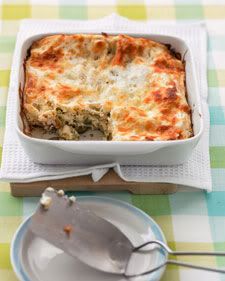
Lately I have really enjoyed my subscription to Martha's Every Day Foods emails. This particular recipe comes from an email entitled "Cucumber and Zucchini Recipes" and that is exactly what I need! I picked 15 cucumbers the other night (that's slicing and does not include the bushel I picked of pickling cucumbers). Thankfully my squash plants are slowly dieing. Earlier in the summer I donated two wagon loads of zucchini to the local food kitchen because we just can't eat them fast enough.

This is a white lasagna and I really enjoyed the creamy texture the added cream cheese gave. Most ricotta dishes seem somewhat grainy in my opinion which isn't a bad thing but the added cream cheese really made this melt in your mouth. (Later in the week while making manicotti I added a little cream cheese again to my ricotta mix prior to stuffing the shells and it was delicious!)
Photobucket


Zucchini Lasagna
Recipe and Photo courtesy of Martha Stewart's Every Day Foods

8 ounces reduced-fat cream cheese, room temperature
1 container (15 ounces) part-skim ricotta cheese
Coarse salt and ground pepper
2 medium zucchini, (8 ounces each) halved lengthwise, then sliced thinly crosswise
1 garlic clove, minced
2 teaspoons dried oregano
6 no-boil lasagna noodles (or 6 cooked noodles)
2 ounces shredded (1/2 cup) part-skim mozzarella cheese

Preheat oven to 425 degrees. Lightly oil an 8-inch square baking dish; set aside.

In a medium bowl, stir together cream cheese and ricotta; season with salt and pepper. In another medium bowl, combine zucchini, garlic, and oregano; season with salt and pepper, and toss to combine.

Spread 1/3 zucchini mixture in prepared baking dish; top with two lasagna noodles, then 1/3 ricotta mixture. Repeat twice with remaining zucchini mixture, noodles, and ricotta mixture, finishing with the ricotta mixture. Sprinkle with mozzarella.

Cover baking dish with aluminum foil; bake until bubbly and noodles are tender, 30 to 35 minutes. Remove foil; bake until golden brown, 15 to 20 minutes more. Let stand 10 minutes before serving.

*Jayne's Notes: I grated extra mozzarella and added it to the ricotta mixture layers for some extra cheesyness.

Thursday, July 16, 2009

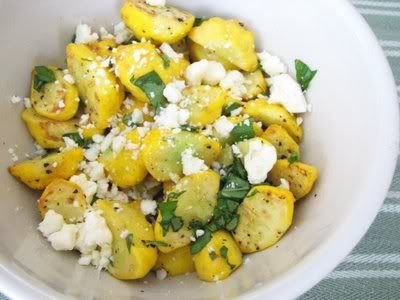
Sautéed Baby Squash with Basil and Feta

Oh how I love thee, my feta cheese!
Our garden is overflowing with summer squash. (The other day my kids took two wagon loads to neighbors to try to thin our squash supply.) This recipe is a perfect way to eat your crook-neck squash even if you're so sick of eating squash you secretly want your plants to die. I've also attempted to grow an herb garden this year and the fresh basil tastes great. (Don't be shy in adding plenty of basil as it's flavor is surprisingly subtle.) Enjoy!!
Photobucket

Sautéed Baby Squash with Basil and Feta

(Recipe courtesy
Cooking Light April 2008, photo courtesy Taste and Tell)

1 tablespoon olive oil

4 cups baby pattypan squash, halved (about 18 ounces)
2 cups sliced leek (about 2)
1/2 teaspoon salt
1/8 teaspoon freshly ground black pepper
3 tablespoons crumbled reduced-fat feta cheese
2 tablespoons finely chopped fresh basil

Heat a large nonstick skillet over medium-high heat. Add oil to pan, swirling to coat; heat 20 seconds. Add squash and leek to pan; sauté 5 minutes or until tender, stirring frequently. Stir in salt and pepper. Transfer squash mixture to a serving platter. Sprinkle with cheese and basil.

Carrot Cake

We celebrated my husband's birthday with this divine dessert. I am not a huge fan of cakes and carrot cake is normally a cake I wouldn't request but this recipe is so good! Carrot cakes in my opinion usually have a somewhat dry and coarse texture but the use of yogurt really adds moisture to this recipe. I especially loved the caramelized crispy edging of the cake so I only frosted the top of the cake and left the sides alone in their crispiness. The Food Network strikes again!

Carrot Cake

Unsalted butter, for the pan
12 ounces, approximately 2 1/2 cups, all-purpose flour, plus extra for pan
12 ounces grated carrots, medium grate, approximately 6 medium
1 teaspoon baking powder
1 teaspoon baking soda
1/4 teaspoon ground allspice
1/4 teaspoon ground cinnamon
1/4 teaspoon freshly ground nutmeg
1/2 teaspoon salt
10 ounces sugar, approximately 1 1/3 cups
2 ounces dark brown sugar, approximately 1/4 cup firmly packed
3 large eggs
6 ounces plain yogurt
6 ounces vegetable oil
Cream Cheese Frosting, recipe follows

Directions
Preheat oven to 350 degrees F. Butter and flour a 9-inch round and 3-inch deep cake pan. Line the bottom with parchment paper. Set aside.

Put the carrots into a large mixing bowl and set aside.

Put the flour, baking powder, baking soda, spices, and salt in the bowl of a food processor and process for 5 seconds. Add this mixture to the carrots and toss until they are well-coated with the flour.

In the bowl of the food processor combine the sugar, brown sugar, eggs, and yogurt. With the processor still running drizzle in the vegetable oil. Pour this mixture into the carrot mixture and stir until just combined. Pour into the prepared cake pan and bake on the middle rack of the oven for 45 minutes. Reduce the heat to 325 degrees F and bake for another 20 minutes or until the cake reaches 205 to 210 degrees F in the center.

Remove the pan from the oven and allow cake to cool 15 minutes in the pan. After 15 minutes, turn the cake out onto a rack and allow cake to cool completely. Frost with cream cheese frosting after cake has cooled completely.

Cream Cheese Frosting:
8 ounces cream cheese
2 ounces unsalted butter, room temperature
1 teaspoon vanilla extract
9 ounces powdered sugar, sifted, approximately 2 cups

In the bowl of a stand mixer with paddle attachment, combine the cream cheese and butter on medium just until blended. Add the vanilla and beat until combined. With the speed on low, add the powdered sugar in 4 batches and beat until smooth between each addition. Place the frosting in the refrigerator for 5 to 10 minutes before using.
Yield: approximately 2 cups

Sunday, July 12, 2009

Mongolian Beef

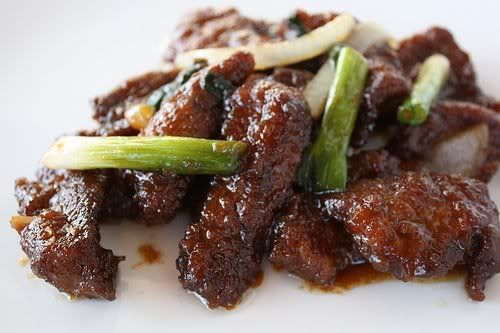
I went searching the other night for a good Mongolian Beef recipe. In truth, I was looking for something as similar to PF Chang's as possible and THIS IS IT!! Delicious!

Photobucket
PF Chang's Mongolian Beef


Sauce:
2 tsp vegetable oil
1/2 tsp minced ginger
1 tbsp chopped garlic
1/2 cup soy sauce
1/2 cup water
3/4 cup dark brown sugar
1 cup vegetable oil

1 lb flank steak
1/4 cup cornstarch
2 large green onions

Make the sauce by heating 2 tsp of oil in medium saucepan over med/low heat. Don't get the oil too hot or you'll get spatter when adding the other liquids. Add ginger and garlic to the pan and quickly add the soy sauce and water before the garlic scorches. Dissolve the brown sugar in the sauce, then raise the heat to about medium and boil the sauce for 2-3 minutes or until the sauce thickens. Remove it from heat.

Slice the flank steak against the grain into 1/4 inch thick bite-size slices. Tilt the blade of your knife at about a 45 degree angle to the top of the steak so that you get wider cuts. Dip the steak pieces into the cornstarch and apply a thin dusting to both sides of each piece of beef. Let the beef sit for about 10 minutes so that the cornstarch sticks. (I just tossed cornstarch in a Ziploc bag with the beef and gave it a good shake. This was much faster then individually dipping the meat.)

As the beef sits, heat one cup of oil in a wok (or skillet). Heat the oil over medium heat until it's nice and hot, but not smoking. Add the beef to the oil and saute for 2 minutes or until the beef just begins to darken on the edges. You don't need a thorough cooking here since the beef will go back on the heat later. Stir the meat around a little so it cooks evenly. After a couple of minutes, use a large slotted spoon to take the meat out and place it on paper towels, then discard the leftover oil.

Put the pan back over the heat, dump the meat back into it and simmer for one minute. Add the sauce, cook for one minute while stirring, then add all the green onions. Cook for one more
minute, then remove the beef and onions with tongs or a slotted spoon to a serving plate.

You can also substitute chicken for the beef, if you prefer it.

*I wanted to serve this with broccoli so I steamed some and layered it between the rice and the beef. Yummy!

Tuesday, July 7, 2009

Warm Asparagus and New Potato Salad

We ate this warm potato salad for dinner tonight with baby potatoes from my garden. I never knew fresh potatoes could taste so good! I was hesitant when I read that blue cheese is the topping for this yummy salad but if you buy a good quality cheese the taste really compliments the potatoes.
Warm Asparagus and New Potato Salad
(Recipe courtesy of AOL Foods)
  • 1 lb asparagus, trimmed, cut into 2-inch lengths and steamed until just tender
  • 1 lb small new potatoes (red or brown), unpeeled, boiled in salted water to cover until just tender, about 10 minutes, drained, and halved or quartered depending on size
  • 1 bunch (6-8) green onions, white and light green parts only, sliced
  • salt and freshly ground black pepper to taste
  • 1/4 c chopped fresh parsley
  • 1/2 c extra-virgin olive oil
  • 2 T balsamic vinegar
  • 1/2 crumbled blue cheese
In a large bowl toss together the asparagus, potatoes and green onions. Season well with salt and pepper.

In a small bowl beat together the parsley, oil and vinegar. Toss some of the dressing with the vegetables. Continue to add dressing until the salad is well moistened.  Serve just warm, topped with the blue cheese.

Monday, June 29, 2009

Springy Shells Casserole

My garden is overflowing with zucchini and summer squash. Thankfully Pioneer Woman posted this recipe for a yummy shell pasta casserole filled with all sorts of good veggies. I think you could also call this a shell lasagna with veggies. Mmmm...it was good!

  • 16 ounces, weight Pasta Shells (medium) Or Other Short Pasta
  • 1 pound Asparagus, Cut Into 1 1/2 Inch Pieces, Discard Tough Pieces
  • 1/2 pound Broccoli, Cut Into Small Florets
  • 1/2 pound Zucchini (about 1 Medium Zucchini) Diced
  • 1/2 cup Frozen Peas
  • 3 whole Green Onions Sliced (white & Light Green Parts)
  • 3 cloves Garlic, Minced
  • 4 Tablespoons Butter
  • 2 Tablespoons Olive Oil
  • 20 ounces, weight Ricotta Cheese (20 - 22 Ozs.)
  • 1/2 teaspoon Salt
  • 2 whole Eggs
  • 1-1/2 cup Parmesan Cheese
  •  Black Pepper, Freshly Ground
  •  Extra Olive Oil For Drizzling

Preheat oven to 350 degrees.
Cook pasta until extremely al dente—with still quite a bit of bite.
Melt butter with the olive oil over medium-low to medium heat, then add in the garlic. Add the asparagus to the pan and cook for five minutes. Sprinkle in a little salt.
Add the broccoli and cook for one minute, then add the zucchini and cook for one or two more minutes. Add the frozen peas, still together then turn off the heat. Set aside.
In a separate bowl, mix the ricotta, eggs, salt, and pepper until well combined.
Butter a 9x13-inch baking dish. Add half the pasta, then spread 1/3 cup of the ricotta mixture over the surface. Sprinkle 1/3 of the Parmesan over the ricotta, then ½ of the vegetables. Repeat with the rest of the pasta, the rest of the ricotta, and another 1/3 of the Parmesan. End with the rest of the vegetables and the rest of the Parmesan.
Drizzle with a couple of tablespoons olive oil, then bake for 25 minutes on 350 degrees or until nice and hot.
Serve with extra Parmesan.

Who Dished it first? The Pioneer Woman

Saturday, June 6, 2009

Turkey Spanakopita Burger


Turkey burgers have so much flavor! This is the third turkey burger recipe I've found and loved. It was also fun disguising spinach in the burger for the kids to get their green veggies. I was disappointed in the burger topping options and will most likely serve this without the bun next time because the meat is tasty enough to stand on it's own. Rachael Ray recommends a cucumber yogurt sauce or a roasted red pepper spread but I think a slice of fresh tomato on top and a side salad would be perfect. (By the way, I was wondering what spanakopita means and looked it up. They are Greek pastries filled with feta and spinach.)


Turkey Spanakopita Burger
recipe courtesy of Rachael Ray

1 tablespoon extra-virgin olive oil, 1 turn of the pan, plus some for drizzling
1 tablespoon butter
3 cloves garlic, 2 chopped, 1 crushed
1/2 red onion, chopped
1 box (10 ounces) frozen spinach, defrosted
2 teaspoons dried oregano, lightly crushed in the palm, divided
1/4 pound feta crumbles
1 1/3 pounds ground chicken or ground turkey breast
1 tablespoon grill seasoning (recommended: Montreal Steak Seasoning by McCormick)

Heat a large nonstick skillet over medium heat. To one side, add a little extra-virgin olive oil and a tablespoon of butter. When butter melts, add the chopped garlic and chopped red onion and cook 5 minutes. Transfer the onions and garlic to a bowl to cool. 

Wring the defrosted spinach dry buy twisting it in a clean kitchen towel over your sink. Separate the spinach as you add it to the bowl with cool onions, garlic and season with 1 teaspoon of oregano. Add feta crumbles then turkey, grill seasoning and a drizzle of extra-virgin olive oil. Mix and form into 4 patties, 1-inch thick. Return pan to stovetop, raise heat to medium-high and add patties cooking 6 minutes on each side. (We grilled our outside on the BBQ. I was nervous that the meat/cheese mixture would gum up the grill or fall apart but it cooked really well and didn't make a mess.)

*Jayne's Notes: I used fresh spinach from the garden, steamed it for 5 minutes and then wrung the excess moisture out before adding it to the recipe. Tonight we served this with a basil pesto aioli sauce but it wasn't great. I really do think this would taste just fine as a bun-less meat main dish and some fresh sliced tomatoes and maybe cucumbers on top.

Oven-roasted Potato Wedges

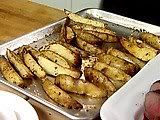
We ate potato wedges for dinner tonight and they were seriously the best I have EVER tasted! Every time I've attempted to make these in the past the potatoes took too long to get soft and the seasonings just weren't very good. I don't know what made tonight's dish so yummy but here are a few of the tricks I learned.

Photobucket
First, I boiled the potatoes for 5-10 minutes until they were just starting to get soft. This decreased the oven cooking time (Yay!) from 50 minutes to 20 at 450 degrees.

Second, I avoided using powdered onion soup or some other odd concoction of flavors. In a bowl I mixed some olive oil, onion powder, garlic powder, salt and pepper. Once the potatoes were drained I poured this oil mixture in and made sure the potatoes were thoroughly coated. Once the potatoes were spread on a baking dish I sprinkled some seasoning salt on top. These were so yummy they didn't need anything else!! 

The third difference from my usual potato wedge baking attempt was that we used FRESH red potatoes straight out of our garden. This was probably the real kicker in making the end product so delicious. Still, I was so amazed at the success of tonight's potato attempt I just had to record my 'recipe'.

Monday, June 1, 2009

Cowboy Spaghetti


Yee-haw! This cowboy spaghetti is a fun and flavorful twist to the typical red sauce with noodles. The original recipe called for beer (no thanks) and fire-roasted crushed tomatoes (this has enough spice as is). Enjoy!

Cowboy Spaghetti
adapted from Rachael Ray's 30-Minute Meals
Serves 4-6
1 pound spaghetti
salt
1 tablespoon extra virgin olive oil
3 slices bacon, chopped
1 pound ground sirloin
1 medium onion, chopped
3 to 4 garlic cloves, chopped
ground black pepper
2 teaspoons hot sauce
1 tablespoon Worcestershire sauce
1/2 cup beef stock 
1 (14-ounce) can chopped or crushed tomatoes
1 (16-ounce) can tomato sauce
8 ounces sharp cheddar
4 scallions, chopped


Heat a pot of water to a boil. Add spaghetti and salt the water. Cook to al dente or with a bite to it.


Heat a deep skillet over medium-high heat. Add extra-virgin olive oil and bacon. Brown and crisp bacon, 5 minutes, remove with a slotted spoon. Drain off a little excess fat if necessary. Leave just enough to coat the bottom of the skillet. Add beef and crumble it as it browns, 3 to 4 minutes. Add onions, garlic and stir into meat. Season the meat with salt and pepper, hot sauce and Worcestershire. Add 1/2 cup beef stock and deglaze the pan. Cook 5 to 6 minutes more then stir in tomatoes and tomato sauce.


Add hot spaghetti to meat and sauce and combine. Adjust seasonings and serve up pasta in shallow bowls. Grate some cheese over the pasta and sprinkle with scallions. Garnish with crisp bacon.
Related Posts Plugin for WordPress, Blogger...