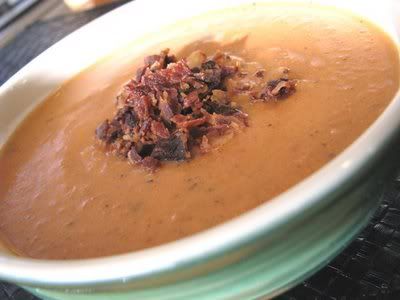
This soup was a lovely calorific end to a year. I think my husband especially liked all the bacon flavor (and fat).
Creamy Fire Roasted Tomato and Bacon Soup
(an original by Jenny at Picky Palate...photo included)
12 strips of bacon, cut into ½ inch pieces
1 Cup white onion, finely chopped
3 medium carrots, peeled and chopped
2 stalks celery, chopped
1 serrano pepper, seeded and chopped
4 cloves fresh garlic, minced
¼ Cup flour
3 14 oz cans reduced sodium chicken broth
28 oz can Muir Glen Fire Roasted Diced Tomatoes (Del Monte worked great as well!)
10-12 fresh basil leaves with stem
Few pinches of salt to taste
¼ teaspoon fresh ground black pepper
1 Cup half and half or heavy cream
1. Place bacon pieces in a large dutch oven or pot over medium heat. Cook until browned and crisp. Remove bacon with a slotted spoon to a paper towel lined plate.
2. Add onion, carrots, celery and pepper to hot bacon grease. Cook until vegetables are softened, about 5 minutes. Stir in garlic for 1 minutes then stir in flour for another minute.
3. Slowly stir in chicken broth. Add tomatoes, basil leaves, salt, pepper and half of crumbled crisp bacon.
4. Remove basil leaves from soup and carefully transfer soup, in batches, to a blender and blend
until smooth. Pour back into pot and stir in heavy cream. Simmer on low for 15 minutes. Top each bowl with remaining crumbled bacon pieces. Enjoy!
*Jayne's notes: I don't have fresh basil so instead I used a shake of dried. Also, we didn't include the serrano pepper and it was plenty spicy.
Wednesday, December 31, 2008
Friday, December 26, 2008
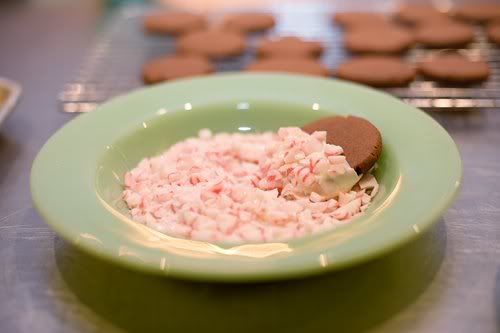
Chocolate Candy Cane Cookies
We made these for our Christmas plates. The good and bad of remaining home for Christmas instead of driving out of state to visit family is that you can procrastinate until the 23rd to make cookies and deliver them to friends. These cookies were really easy but they have such a cute appearance that a plate of these looks like you spent a lot of preparation time. One note about this recipe is that even before refrigerating the dough it is incredibly stiff! Dan came home while I was baking these and thought the cookies were burning but he was smelling the exhausted motor of my hand mixer.
Chocolate Candy Cane Cookies
Pioneer Woman's Recipe (and photo)
2 sticks (1 cup) regular (salted) butter, slightly softened
1 cup powdered (confectioner’s) sugar
1 egg
2 teaspoons vanilla
2 1/2 cups flour
1/2 cup unsweetened cocoa powder
1 teaspoon salt
4 squares almond bark or white baking chocolate (almond bark works best and is cheaper)
Large handful of red or green peppermints
Cream softened butter with powdered sugar. Add egg and vanilla and mix to combine. Add dry ingredients and mix together until dough comes together. Place plastic wrap on surface of dough and refrigerate for 2 hours.
Unwrap candies and place them in plastic bags. Beat with a mallet until finely crushed, leaving larger chunks if desired.
Preheat oven to 375 degrees. Roll cookie dough in walnut-sized pieces and place on a cookie sheet. Gently press balls flat with a plain, smooth surface. Bake for 7 to 9 minutes, being careful not to burn. Cookies will remain the same general size and shape after they bake.
Remove from oven and place cookies on a cooling rack. Allow them to cool completely.
Place crushed candies in bowl. Melt almond bark and begin to dip cooled cookies, coating only half the cookie. Immediately sprinkle crushed peppermints over both sides of the almond bark. Gently set on parchment paper or other nonstick surface and allow to cool before serving.
Monday, December 22, 2008
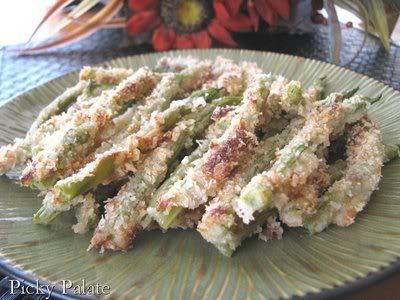
Crispy Parmesan-Ranch Green Beans
(Photo coutesy of Picky Palate)
Crispy Parmesan Ranch Crusted Green Beans¾ Cup prepared Ranch Dressing
1 egg, beaten
1 ½ Cups panko bread crumbs
½ Cup grated parmesan cheese
¼ teaspoon salt
¼ teaspoon pepper
½ lb washed and trimmed fresh green beans
1. Preheat oven to 450 degrees F. Combine ranch dressing and egg together in a shallow dish. Combine panko, parmesan, salt and pepper in a separate shallow dish. Lightly dip beans into ranch dressing. Press into crumb mixture then place onto a parchment lined baking sheet (they’ll stick to the pan if not, even if sprayed with cooking spray). Do this process until all beans have been coated. Bake for 15 minutes or until crust is crispy and golden. Let cool for 3 minutes then serve.
4 servings
Thursday, December 18, 2008
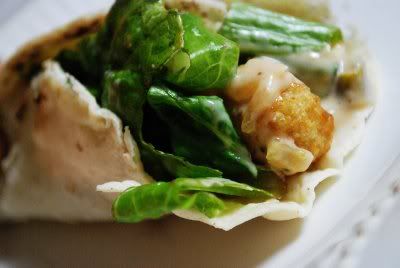
Quick Fish Tacos & Homemade Tarter Sauce
We had fish tacos for dinner tonight. I don't think I have ever eaten a frozen fish stick in my life so I was wary about this recipe but Rachelle has awesome taste so I was trusting when she said this was 'dinner worthy'. We all really enjoyed this tasty treat, especially me because I had dinner ready and on the table in 10 minutes flat!!
Just a quick note: The homemade tarter sauce MAKES this meal! Substituting store-bought tarter just won't cut it. (Store-bought tarter + frozen fish = blah!)
Quick Fish Tacos and Homemade Tartar Sauce
an original recipe (and photo) by rachelle at fashionably foodie
12 fish sticks (Use a high quality fish for the best tacos. You'll regret it if you don't!)
12 corn tortillas
1 recipe homemade tartar sauce
shredded cabbage or lettuce
limes
Preheat oven and start chopping cabbage or lettuce and halving limes. Warm tortillas in with a wet paper towel wrapped around them in the microwave. (These are best simply with warm tortillas, not fried.) Put fish sticks in the oven and mix up the tartar sauce. Serve tacos in shells with a layer of shredded cabbage or lettuce, a piece of fish, a big drizzle of sauce and a squeeze of lime.
Homemade Tartar Sauce
1/2 cup mayonnaise
1/4 cup sweet relish
2 Tablespoons ketchup (optional)
1/4 teaspoon salt
1/4 teaspoon garlic salt
1/8 teaspoon pepper
Mix well.
Wednesday, December 10, 2008
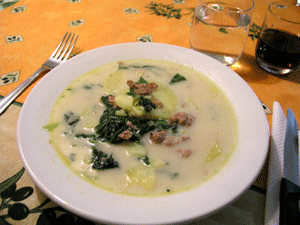
Zuppa Toscana
Photo courtesy of Tuscan Recipes
Zuppa Toscana
Olive Garden's recipe adapted by Lori Hopkin
1 (16 oz) package of mild or spicy sausage
6 slices of bacon
1 medium onion, chopped
2-3 cloves of garlic, minced
1 qt water
2 T chicken bouillon
2 medium potatoes cut into 1/4 in slices
2 cups of kale
1/8 - 1/4 crushed red pepper (optional)
1/3 cup of heavy cream
1. In a large cooking pot cook sausage over medium high heat until done. Remove from pan. Drain fat.
2. In same cooking pot, fry bacon until crisp; remove, drain; drain on paper towels crumble and set aside. Drain all but 1-tablespoon bacon fat from pot.
3. Add onions to same cooking pot and cook over medium heat until softened. Add garlic and cooked for 1 minute. Add the water, chicken base and potatoes. Bring to boiling, reduce heat and simmer, co0vered, for 15 minutes or until potatoes are tender.
4. Return the cooked sausage and crumbled bacon to the pot. Add the kale and crushed red pepper, if using, and simmer for 4 minutes. Stir in the cream and cook until heated through, without boiling. Serving hot.
Makes 4 to 6 servings.
*An easier option would be to substitute with 1-pound bulk Italian sausage; crumble and cook until done; drain fat, set aside and continue with recipe as directed.
Jayne's Notes: I love this soup but as you can see from the ingredients it isn't for the dieting crowd. We used to have a Girls' Night recipe club and Lori shared this yummy favorite with us. It is in fact very similar to Olive Garden's Tuscana. When making this recipe I usually add another quart of broth to thin the soup. Also, kale is chewier than spinach so I try to cut it into smaller pieces for the kids' sake (but not too small because it holds it's shape and looks pretty somewhat larger leafed).
Monday, December 8, 2008
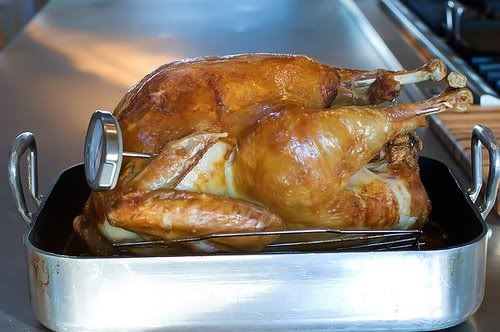
Turkey Brine
Photo of PW's turkey -- ours was demolished before it's photo op
I know it's December but we're revisiting Thanksgiving in my house today. I bought a 16 lb turkey for $5 and my husband was excited until he saw the generic-brand label. Let me just say that you can purchase the cheapest turkey in the store and with this brine recipe it will taste great! (I originally typed 'amazing' but I wonder what a fresh turkey would taste like with this brine. Too bad I'll never know...) Since it's snowy yet not below freezing we put our brine/turkey in a large covered bucket and set it on our porch overnight. Luckily our bird didn't freeze by morning. This is to die for turkey brine!! I think we will brine our turkeys from now on. The meat was so tender and juicy it just fell off the bones. Mmmm...now I get to eat leftovers!!
PW’s Homemade Turkey Brine (This is enough for a 20-lb turkey; you can decrease the quantity for a smaller bird.)
2 gallons water
2 cups apple juice
2 cups kosher salt (can decrease to 1 1/2 cups if you’re concerned about salt)
2 cups brown sugar
2 garlic cloves, crushed
5 bay leaves
3 tablespoons black peppercorns
1 tablespoons dried rosemary
Peel of 2 oranges (I just roughly slice off the orange part of the peel (not much white pith) with a sharp knife, then give it a rough chop to release all the citrus-y wonderfulness)
Combine all ingredients in a large pot and bring to a boil. Turn off heat immediately, cover, and allow mixture to come to room temperature. Cool mixture in the fridge until you’re ready.
To brine the turkey, remove turkey from wrapper, remove gross bags, and rinse thoroughly under cool water. Place the turkey into a plastic brining bag (available at many kitchen shops, maybe even stores like Target) OR a very large pot. Pour cool brine mixture over the top, adding extra cold water if you need more to cover. Seal bag or cover pot and allow turkey to brine in refrigerator for 8 to 18 hours before roasting.
Before roasting, remove turkey from brine and rinse thoroughly under cold water. Pat dry. Discard brine.
PW's IMPORTANT BRINE NOTE: I forgot to mention that when you brine your turkey, the drippings are quite salty. For this reason, it is VERY important that you use a no-sodium (or low-sodium) chicken broth when you make the turkey gravy. Also, I often will cut the drippings with the giblet water to decrease the saltiness. Also, many frozen turkeys are injected with a sodium solution—it’s best NOT to brine these turkeys! Brining fresh turkeys is the way to go.
*Jayne's notes: We did brine a store bought, sodium injected turkey, but it tasted great being brined. Our gravy was salty so I will dilute it even more next time, although my husband liked it and he didn't think it was too salty.
Sweet Potatoes
My family eats their veggies. I'm not sure if my squash/sweet potato fancy began with my first child and making baby food for her. (By the way, I DON'T taste-test baby food. Dan does...talk to him about his crazy idea that he needs to taste Gerber's Turkey Tetrazini before feeding it to our baby. Yuck! Sorry Dan but I just had to add this little funny.) Anyhow, we like eating sweet potatoes for dinner served with a little butter and brown sugar, but we've never tasted any potato (sweet or not!) like these!! The potatoes were very creamy and the top streusel layer was crunchy, sugary, nutty, and just divine!
Pioneer Woman's Sweet Potatoes
4 medium sweet potatoes
1 c sugar
1 c milk
2 eggs
1 t vanilla extract
1 t salt
1 c brown sugar
1 c pecans
1/2 c flour
3/4 stick butter (3/8 cup)
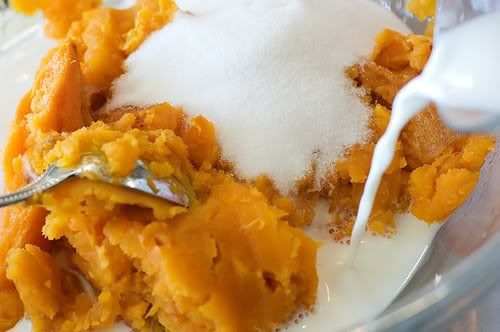
Wash the 4 sweet potatoes and bake them at 375 until fork tender, about 30 minutes. When they are finished cooking slice them open and scrape the flesh into a bowl. Add the sugar, milk, eggs, vanilla and salt. With a potato masher mash them just enough (you don't want them to be perfectly smooth).
In a separate bowl combine brown sugar, pecans, flour and softened (but not melted) butter. Mash with a fork or pastry cutter.
Spread sweet potato mixture in a baking dish and sprinkle the topping on. Bake at 400 for 30 minutes or until golden brown.
Stuffing/Dressing
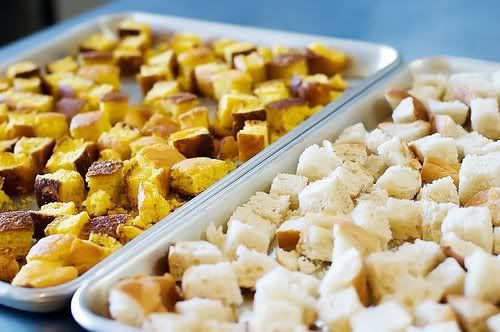
Photo Courtesy of PioneerWoman
Stuffing/Dressing has never been my favorite Thanksgiving dish until the past few years. I became a fan once I tasted Kneaders stuffing mix with it's huge asiago cheese bread cubes. It is to die for!! Since we didn't have access to Kneaders in Utah this year I found this 'next best' option on Pioneer Woman's site. I liked the unique combo of french bread and cornbread and the fact that they are larger cubes instead of small cubes that tend to turn to mush (almost like a dressing in the form of oatmeal...know what I mean?)Pioneer Woman's Thanksgiving Stuffing (Delicious!!)
1 recipe of PW's cornbread (see below)
1 loaf somewhat crusty french bread
1 medium onion, diced
low sodium chicken broth (about 4 cups)
1/2 c butter
2 c celery, chopped
1/4 c fresh parsley
1/2 t dried basil
2-3 t fresh rosemary
1/2 t dried thyme
salt
First chop cornbread and french bread into 1 inch cubes, spread on baking sheets and let dry for approx. 24 hours.
Melt butter in large saucepan. Add onion and celery, cooking until onions are almost translucent. Add 4 c chicken broth and bring to a boil. Add herbs and stir until combined.
Place all dried bread cubes in large mixing bowl and gradually add broth mixture, tossing lightly as you go. If the mixture is not quite moist enough add more broth and stir. Salt carefully...you don't want to oversalt stuffing.
Either stuff the bird and bake according to directions or place in a baking dish and bake at 350 for 20-25 minutes or until golden brown.
Cornbread:
1 c yellow corn meal
1/2 c flour
1 t salt
1 c buttermilk
1/2 c milk
1 egg
1 T baking powder
1/2 t baking soda
1/4 c plus 2 T shortening
Preheat oven to 450. Heat shortening in iron skillet. Combine corn meal, flour baking powder and soda, and salt in mixing bowl. In separate bowl, combine buttermilk, milk and egg. Pour milk mixture into flour mixture and stir. Add 1/4 c melted shortening, stirring constantly. Pour into hot pan and bake 20-25 minutes or until top is golden brown.
Friday, December 5, 2008
Cupcake Pops
I was inspired by Bakerella to make these cupcake pops. Let me just say how yummy these are!! The outer chocolate shell kept the cake so very moist and yummy. I made some with lolli-pop sticks and some were too top heavy so I bagged them like truffles.
Here is Bakerella's simple yet satisfying recipe in my own words:
- Bake a cake per the cake mix directions. Let cool completely.
- Crumble the cake in a large mixing bowl one quarter at a time. Add a container of frosting (I used store-bought) to the desired consistency. Begin to roll the cake mixture into walnut-sized balls by scooping with a small cookie scoop. You'll need to wash your hands after every 5-10 cake balls because the cake begins to adhere more to your hands then the ball. Once your cookie sheet is filled with cake balls put them in the freezer for 20 minutes or until completely frozen.
- While these are freezing begin warming up your double boiler to melt the dipping chocolate. (I don't have a double boiler so a glass bowl resting in a saucepan with boiling water works great.) Remove the cakes from the freezer and carefully begin to dip them in the chocolate. I used both a fork to handle the cake as well as my lolli-pop sticks. If the cakes get too warm they will begin to crumble so just put them back in the freezer if this happens. Place newly dipped chocolate cakes on wax paper, decorate with sprinkles if desired (the chocolate hardens fast so be sure to remember to sprinkle these before it dries).
*Jayne's Notes: My cake was left to cool a little too long so I ended up using all of the frosting to moisten it but I don't think normally you need all of it. With too much frosting the cake balls get too sticky for handling. Also, if you decide to make these into lolli-pops then roll your cake balls small or else they will be too dense and heavy to stay on the stick.
Tuesday, December 2, 2008
Ginger Chicken
*Photo courtesy of Martha Stewart
Ginger Chicken
1 three-inch piece fresh ginger, peeled and cut into 1/8-inch-thick
matchsticks (1/2 cup)
2 tablespoons canola oil
1 1/2 pounds boneless, skinless chicken breasts, cut into 1 1/2-inch chunks
1 large onion, thinly sliced
2 garlic cloves, minced
1/4 cup soy sauce
2 tablespoons white vinegar
2 tablespoons sugar
1/2 cup sliced scallions
1. Soak ginger in cold water 10 minutes; drain.
2. Heat oil in a skillet over high heat; brown chicken in two batches, 6
to 8 minutes. Set aside.
3. In same skillet over medium heat, cook ginger, onion, and garlic,
stirring until browned, 8 to 10 minutes. Add soy sauce, vinegar, and
sugar; cook over high heat until thick, 3 to 4 minutes. Add chicken; stir
to warm. Remove from heat; stir in scallions.
Serve over Chinese noodles or steamed rice.
*Jayne's Notes: Warning to all you faint-of-heart at the sight of ginger. As you see from above, this has a lot of it. Soaking the ginger and then browning it with the onions does lower the intensity. I like authentic flavor packed Chinese food but if you want to give this recipe a try just decrease the amount. The recipe is worth trying so don't be scared off! My kiddos eat this happily with no complaints. Tonight I added about a quarter cup grated carrots. I liked the color the carrots added and it tasted good as well. Also, I'm always trying to sneak extra veggies into my kids' food and this worked just dandy! This dish is all meat so be sure to serve a veggie on the side. Tonight we served this on steamed rice with steamed cabbage on the side. Yum!
Apple Crumb Pie
Apple Crumb Pie
Pastry for single-crust 9-inch pie (I used our cookie crust recipe)
6 c. chopped, peeled, tart apples
2 T. butter, melted
2 T. sour cream
4 t. lemon juice
1/2 c. sugar
1 T. flour
1/2 t. cinnamon
1/2 t. nutmeg
Topping:
1/2 c. flour
1/2 c. sugar
1/4 c. cold butter
Make crust (don’t bake). In large bowl combine all ingredients, except topping and put in crust. For topping, combine flour and sugar in bowl; cut in butter until mixture resembles coarse crumbs. Sprinkle over filling. Bake at 375 degrees for 45-50 minutes or until filling is bubbly and apples are tender. Cool on wire rack.
*Jayne's Notes: This recipe is courtesy of Dan's sister Rebecca. I enjoyed this recipe especially because of the crumb topping. Apple pies to me are normally too doughy with a dough crust on top and bottom so I enjoyed this change.
Pecan Pie
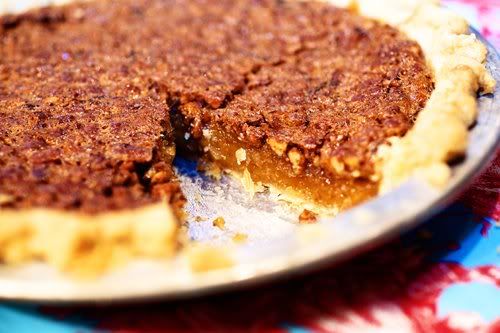
(*Photo courtesty of PW)
I have never been a pecan pie girl; I prefer berry pies. I'm not sure if my dislike stems from not liking nuts as a child or because I don't think this pie looks particularly pretty. Either way, this has always been a pie I steer clear of...until this past Thanksgiving. We made this pecan pie recipe and I really enjoyed it!! Yum, yum, yum!!
PW’s Pecan Pie
1 unbaked pie crust
1 cup white sugar
2 tablespoons brown sugar
1/4 teaspoon salt
1 cup corn syrup
1/3 cup melted butter (regular, salted)
3 eggs, beaten
1/4 teaspoon vanilla
1 heaping cup chopped pecans
Mix sugar, brown sugar, salt, corn syrup, butter, eggs, and vanilla together in a bowl. Pour chopped pecans in the bottom of the pie shell. Pour syrup mixture over the top. Bake pie at 350 degrees for 50 minutes, being careful not to burn pecans and crust.
Allow to cool for several hours or overnight. Serve in thin slivers.
Peanut Butter Ritz Treats
We're always looking for little treats to bribe our kiddos to eat their dinner. My girls are actually really good eaters but sometimes when you want them to eat their bell peppers you have to give a little encouragement. The other night we tried this fun treat. It was easy to make and tasty.
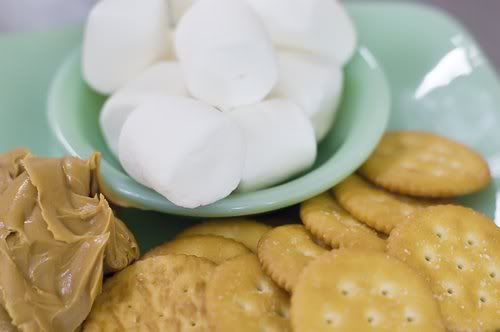
Instructions: (quoting Pioneer Woman...and this is her photo too!)
Spread peanut butter on the crackers, top each cracker with a marshmallow, and pop them in the oven under the broiler. How brown/black you want your marshmallows will determine how close to the cooking element you put the cookie sheet and how long you bake them.
Once they are cooked to your desired yummyness, just pop these gooey treats into your mouth and enjoy!
(P.S. I'm a sucker for melted PB so I enjoyed these as well!)
Ritz+pb+'shmellows = yummy for my tummy
Subscribe to:
Posts (Atom)
